How to Make a Fall Bow Wreath
Don't get me wrong—I am so excited to start decking the halls for Christmas. But there's juuuust one more fall craft I needed to make before Thanksgiving, and it all started with the ultimate vintage find.
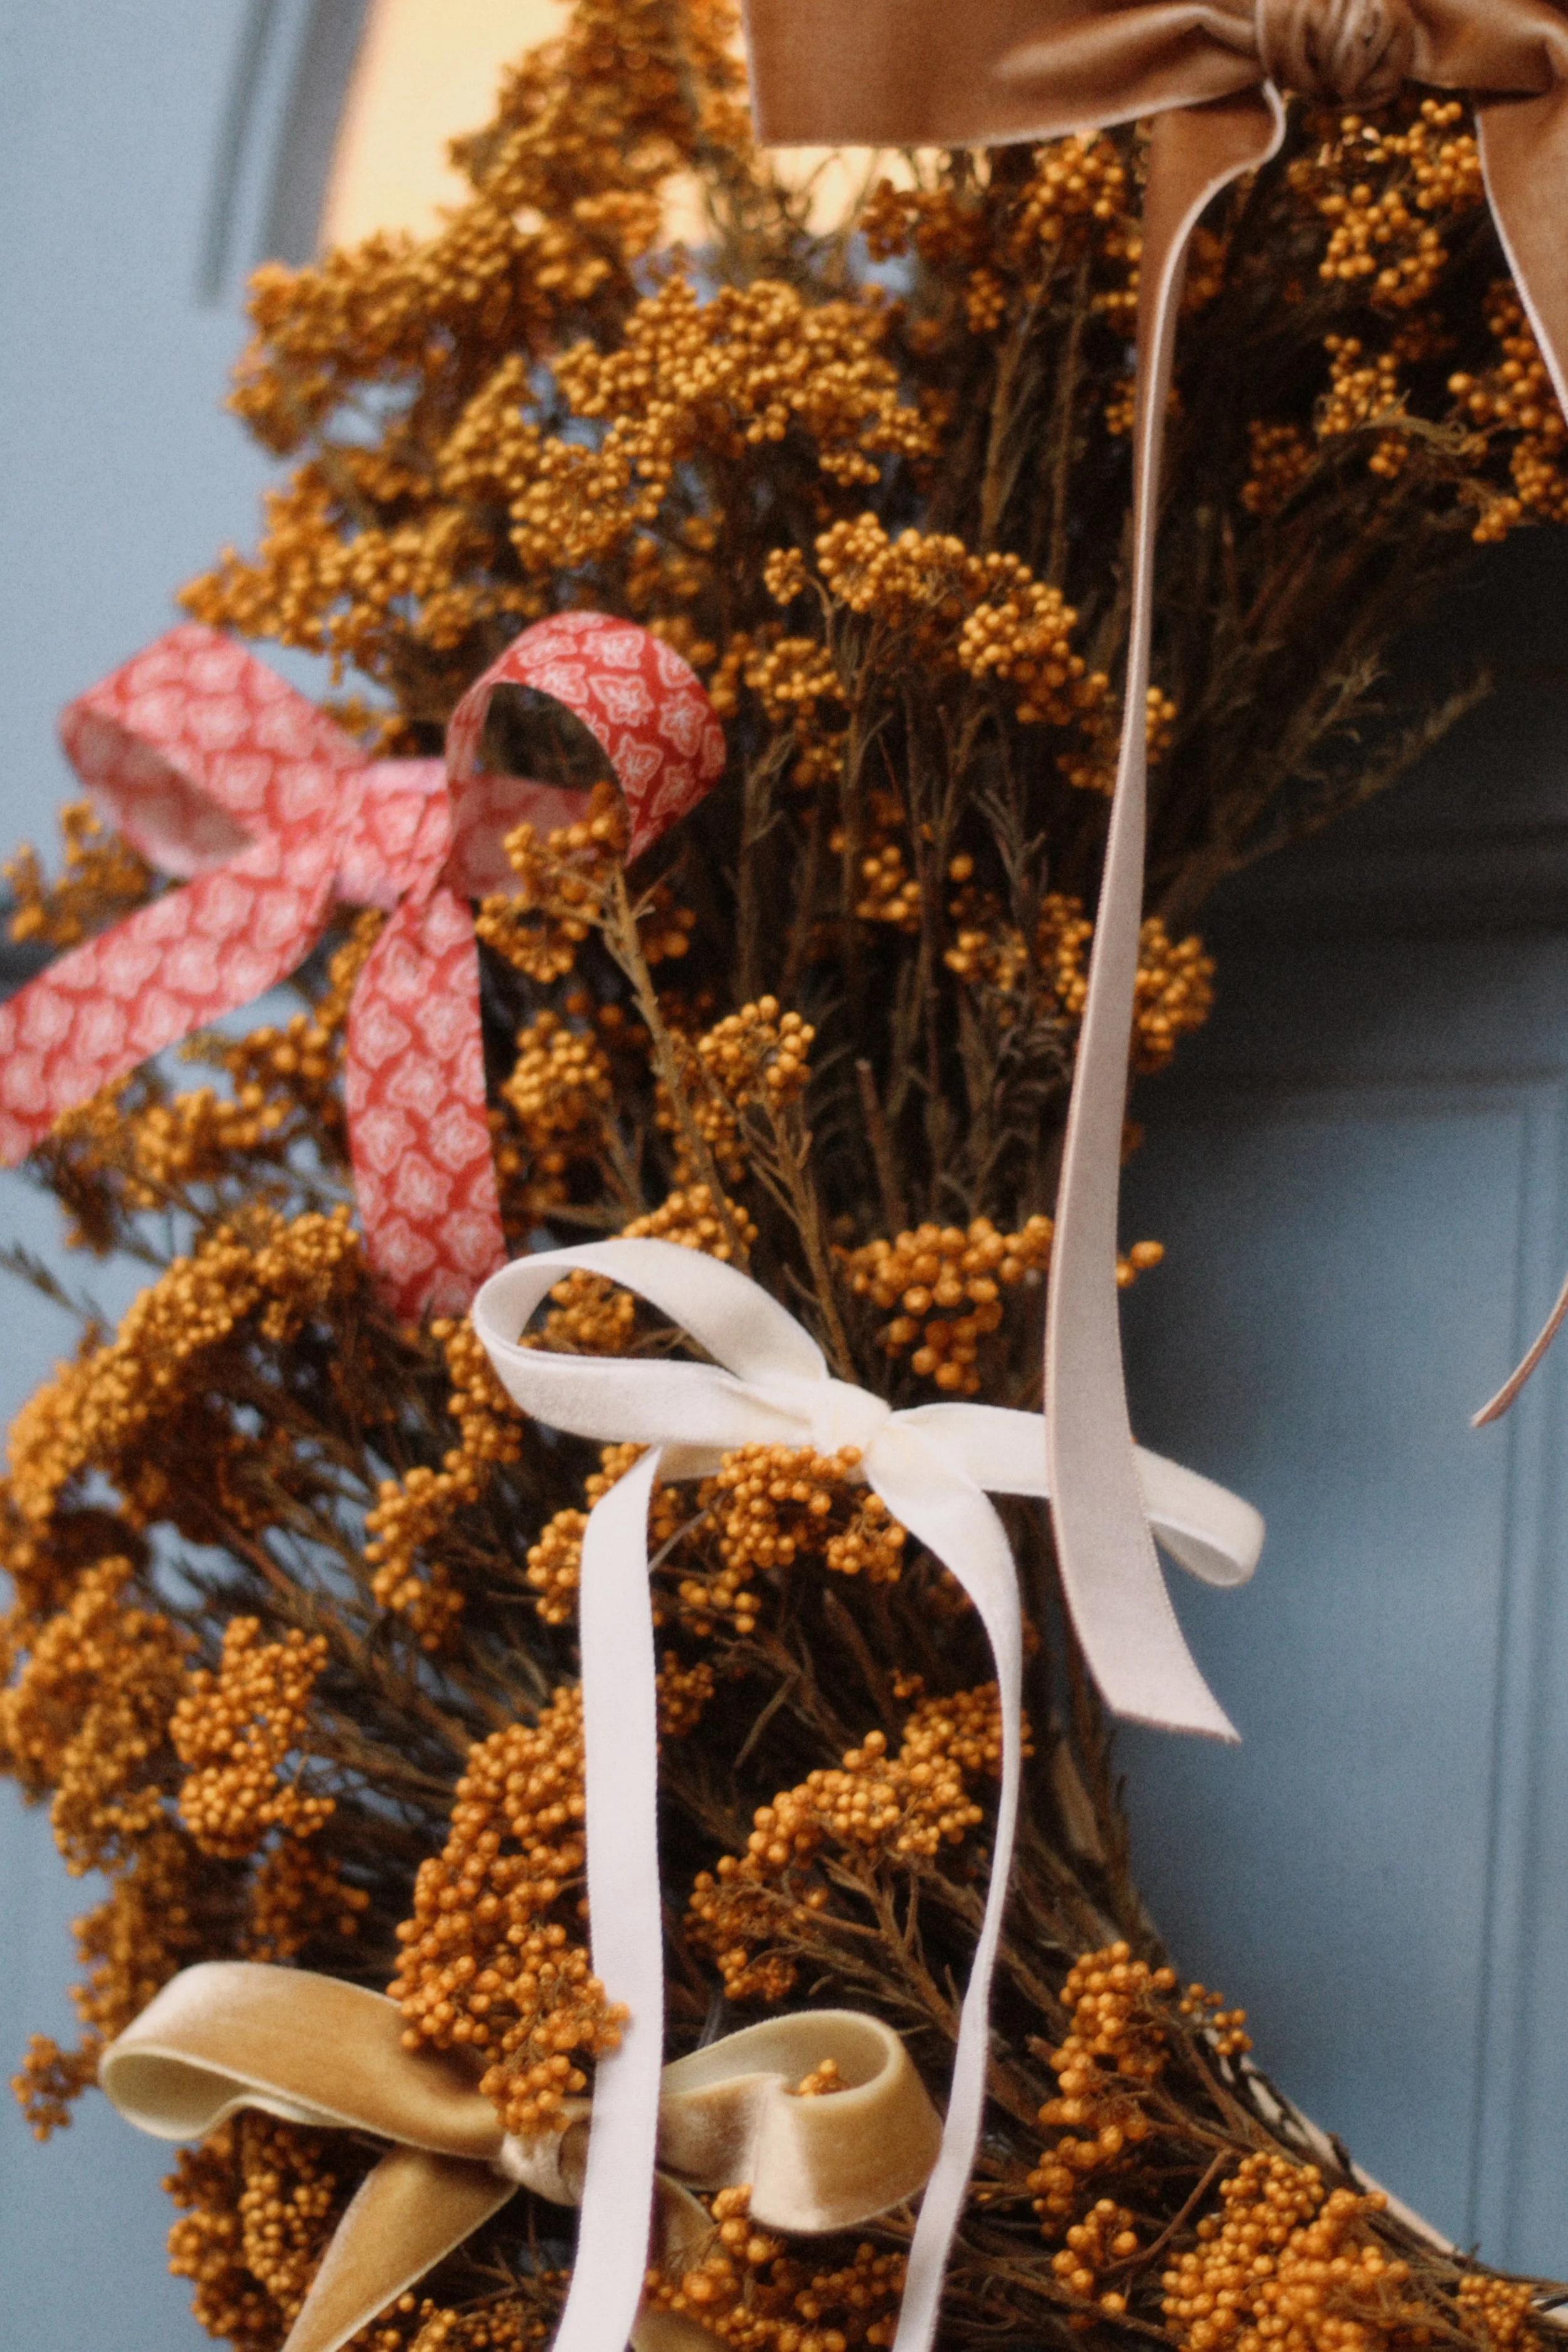
While browsing an antique store with my friend Casey, I stumbled upon the most charming vintage ribbon in perfect autumn tones. I knew instantly it was destined to become a fall wreath. I was inspired by Christmas wreaths with layers of bows in different colors and textures (see inspo below), and I knew I’d be able to make the perfect fall version with my vintage ribbon as the star of the show!

MATERIALS AND SUPPLIES YOU’LL NEED:
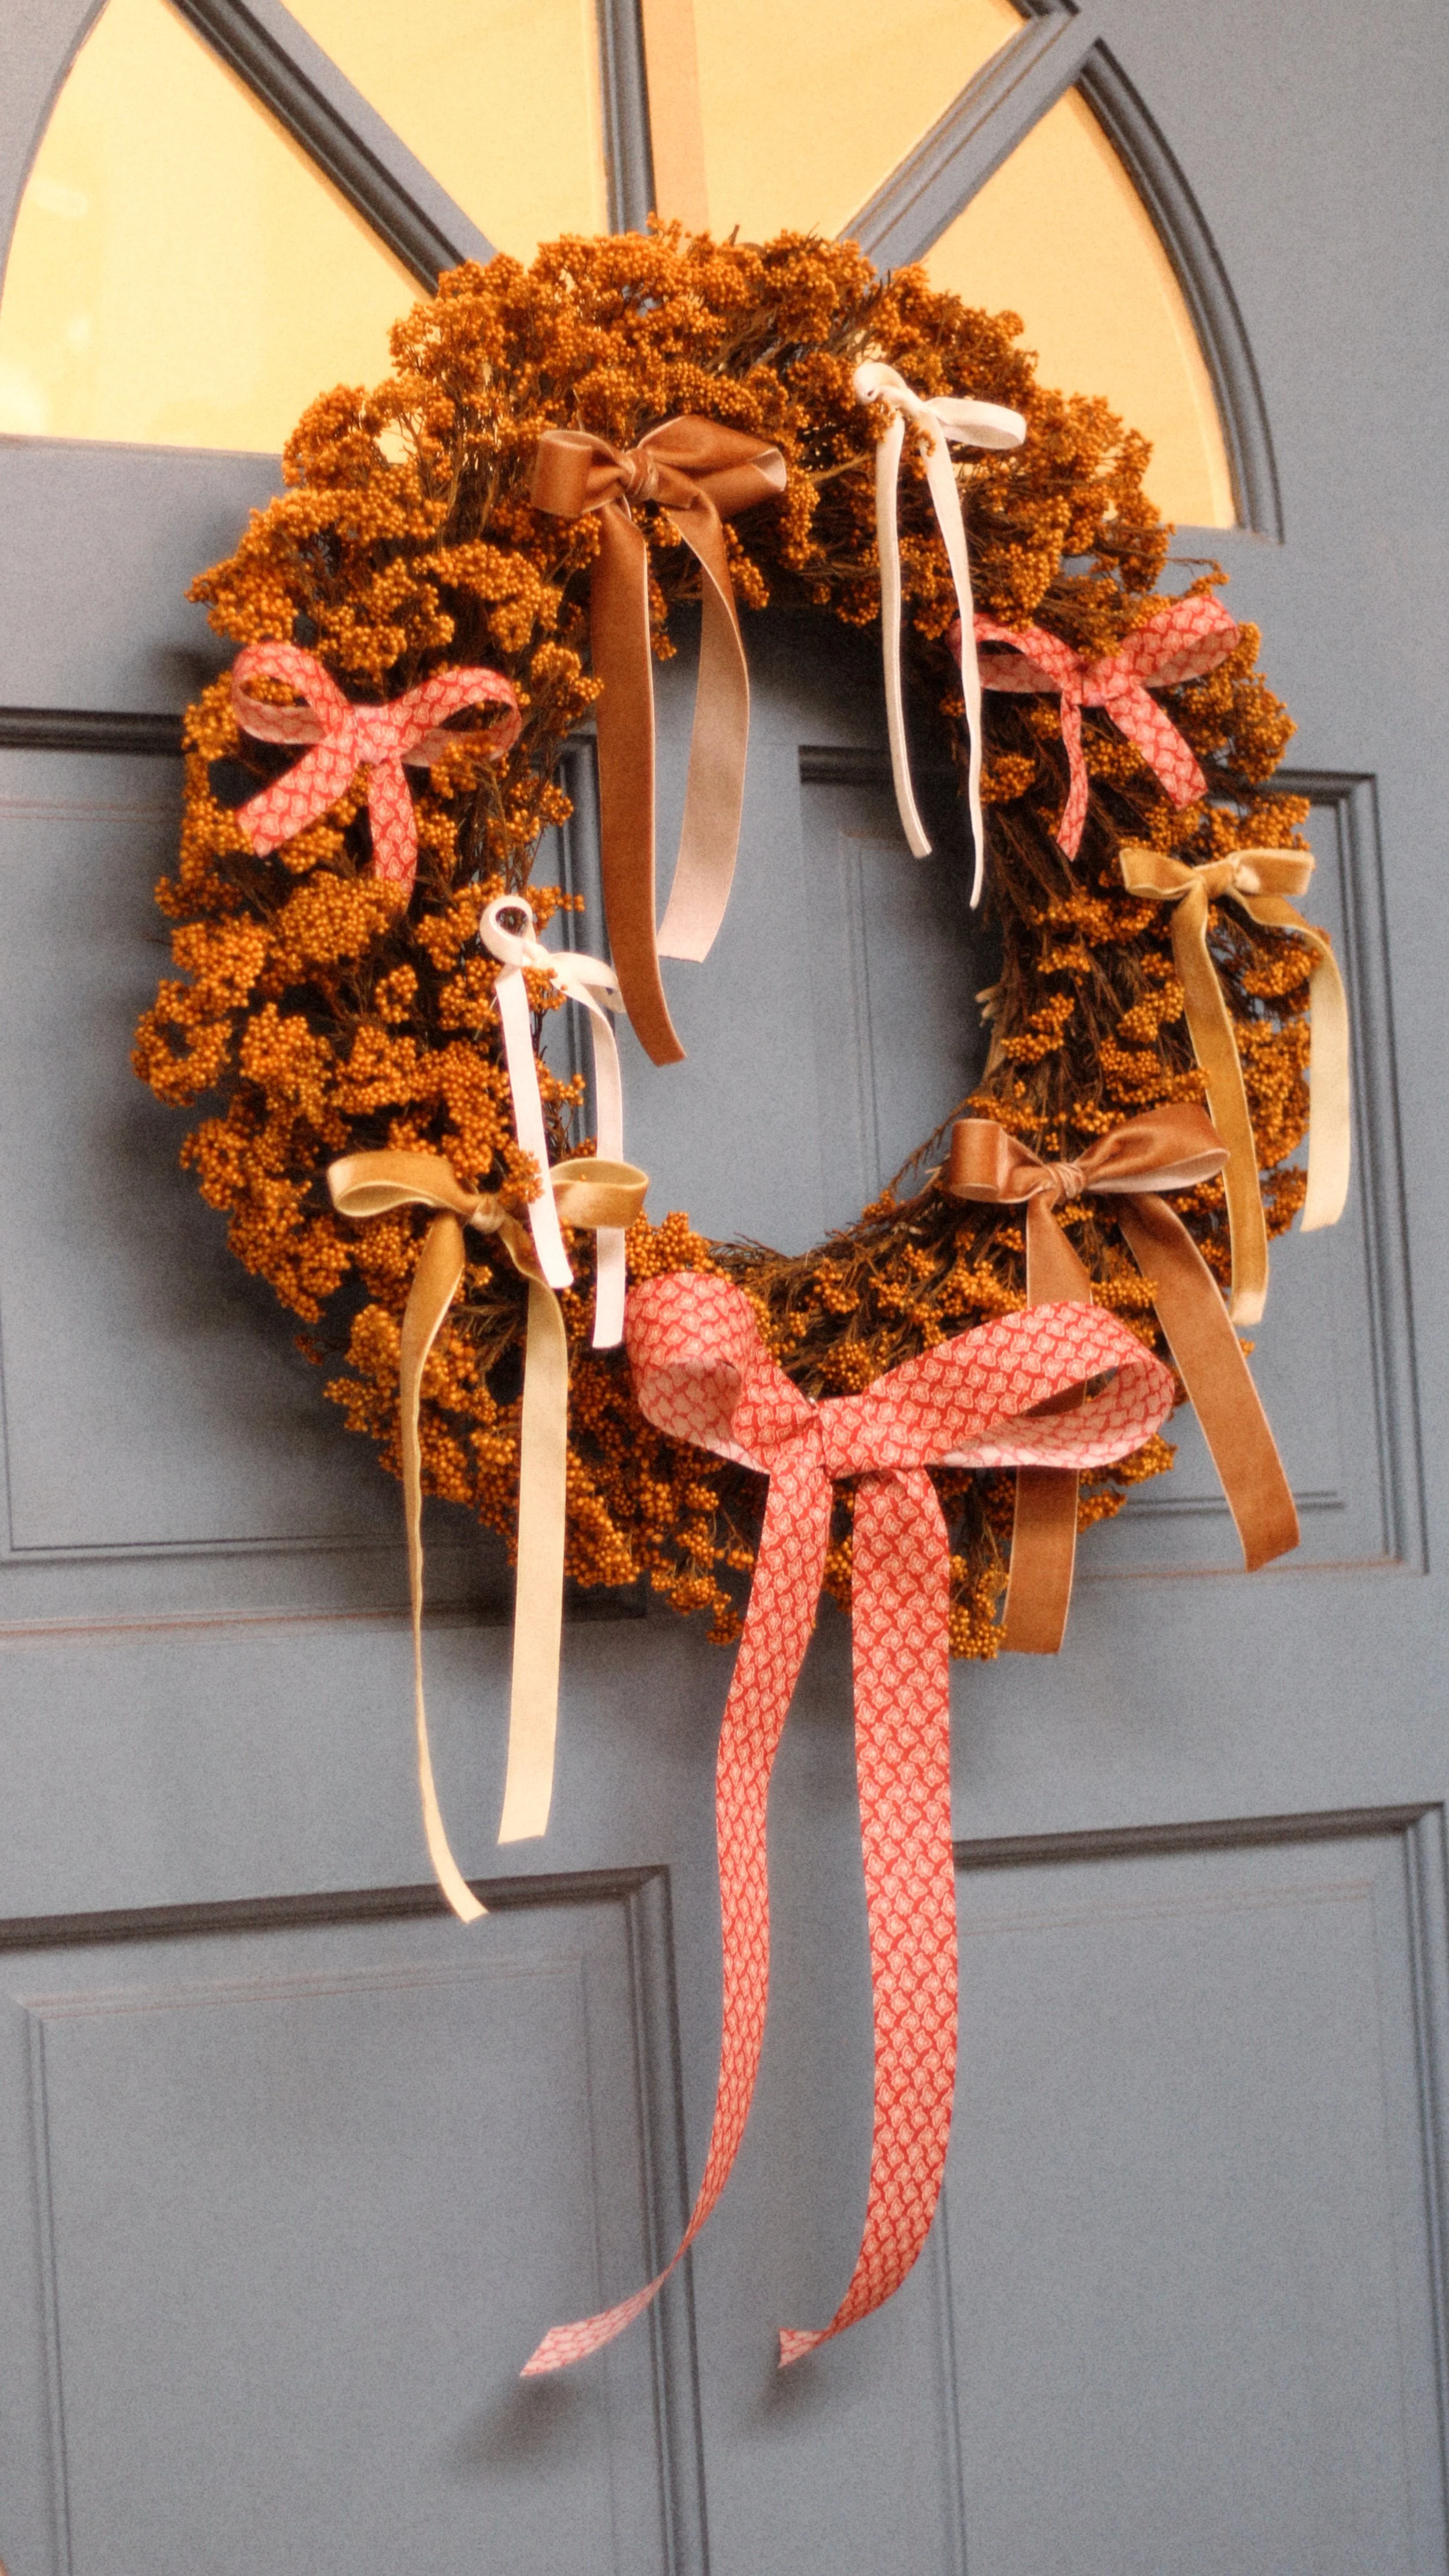
WREATH FOR YOUR BASE (I used this dried floral wreath, but here is a great faux wreath option)
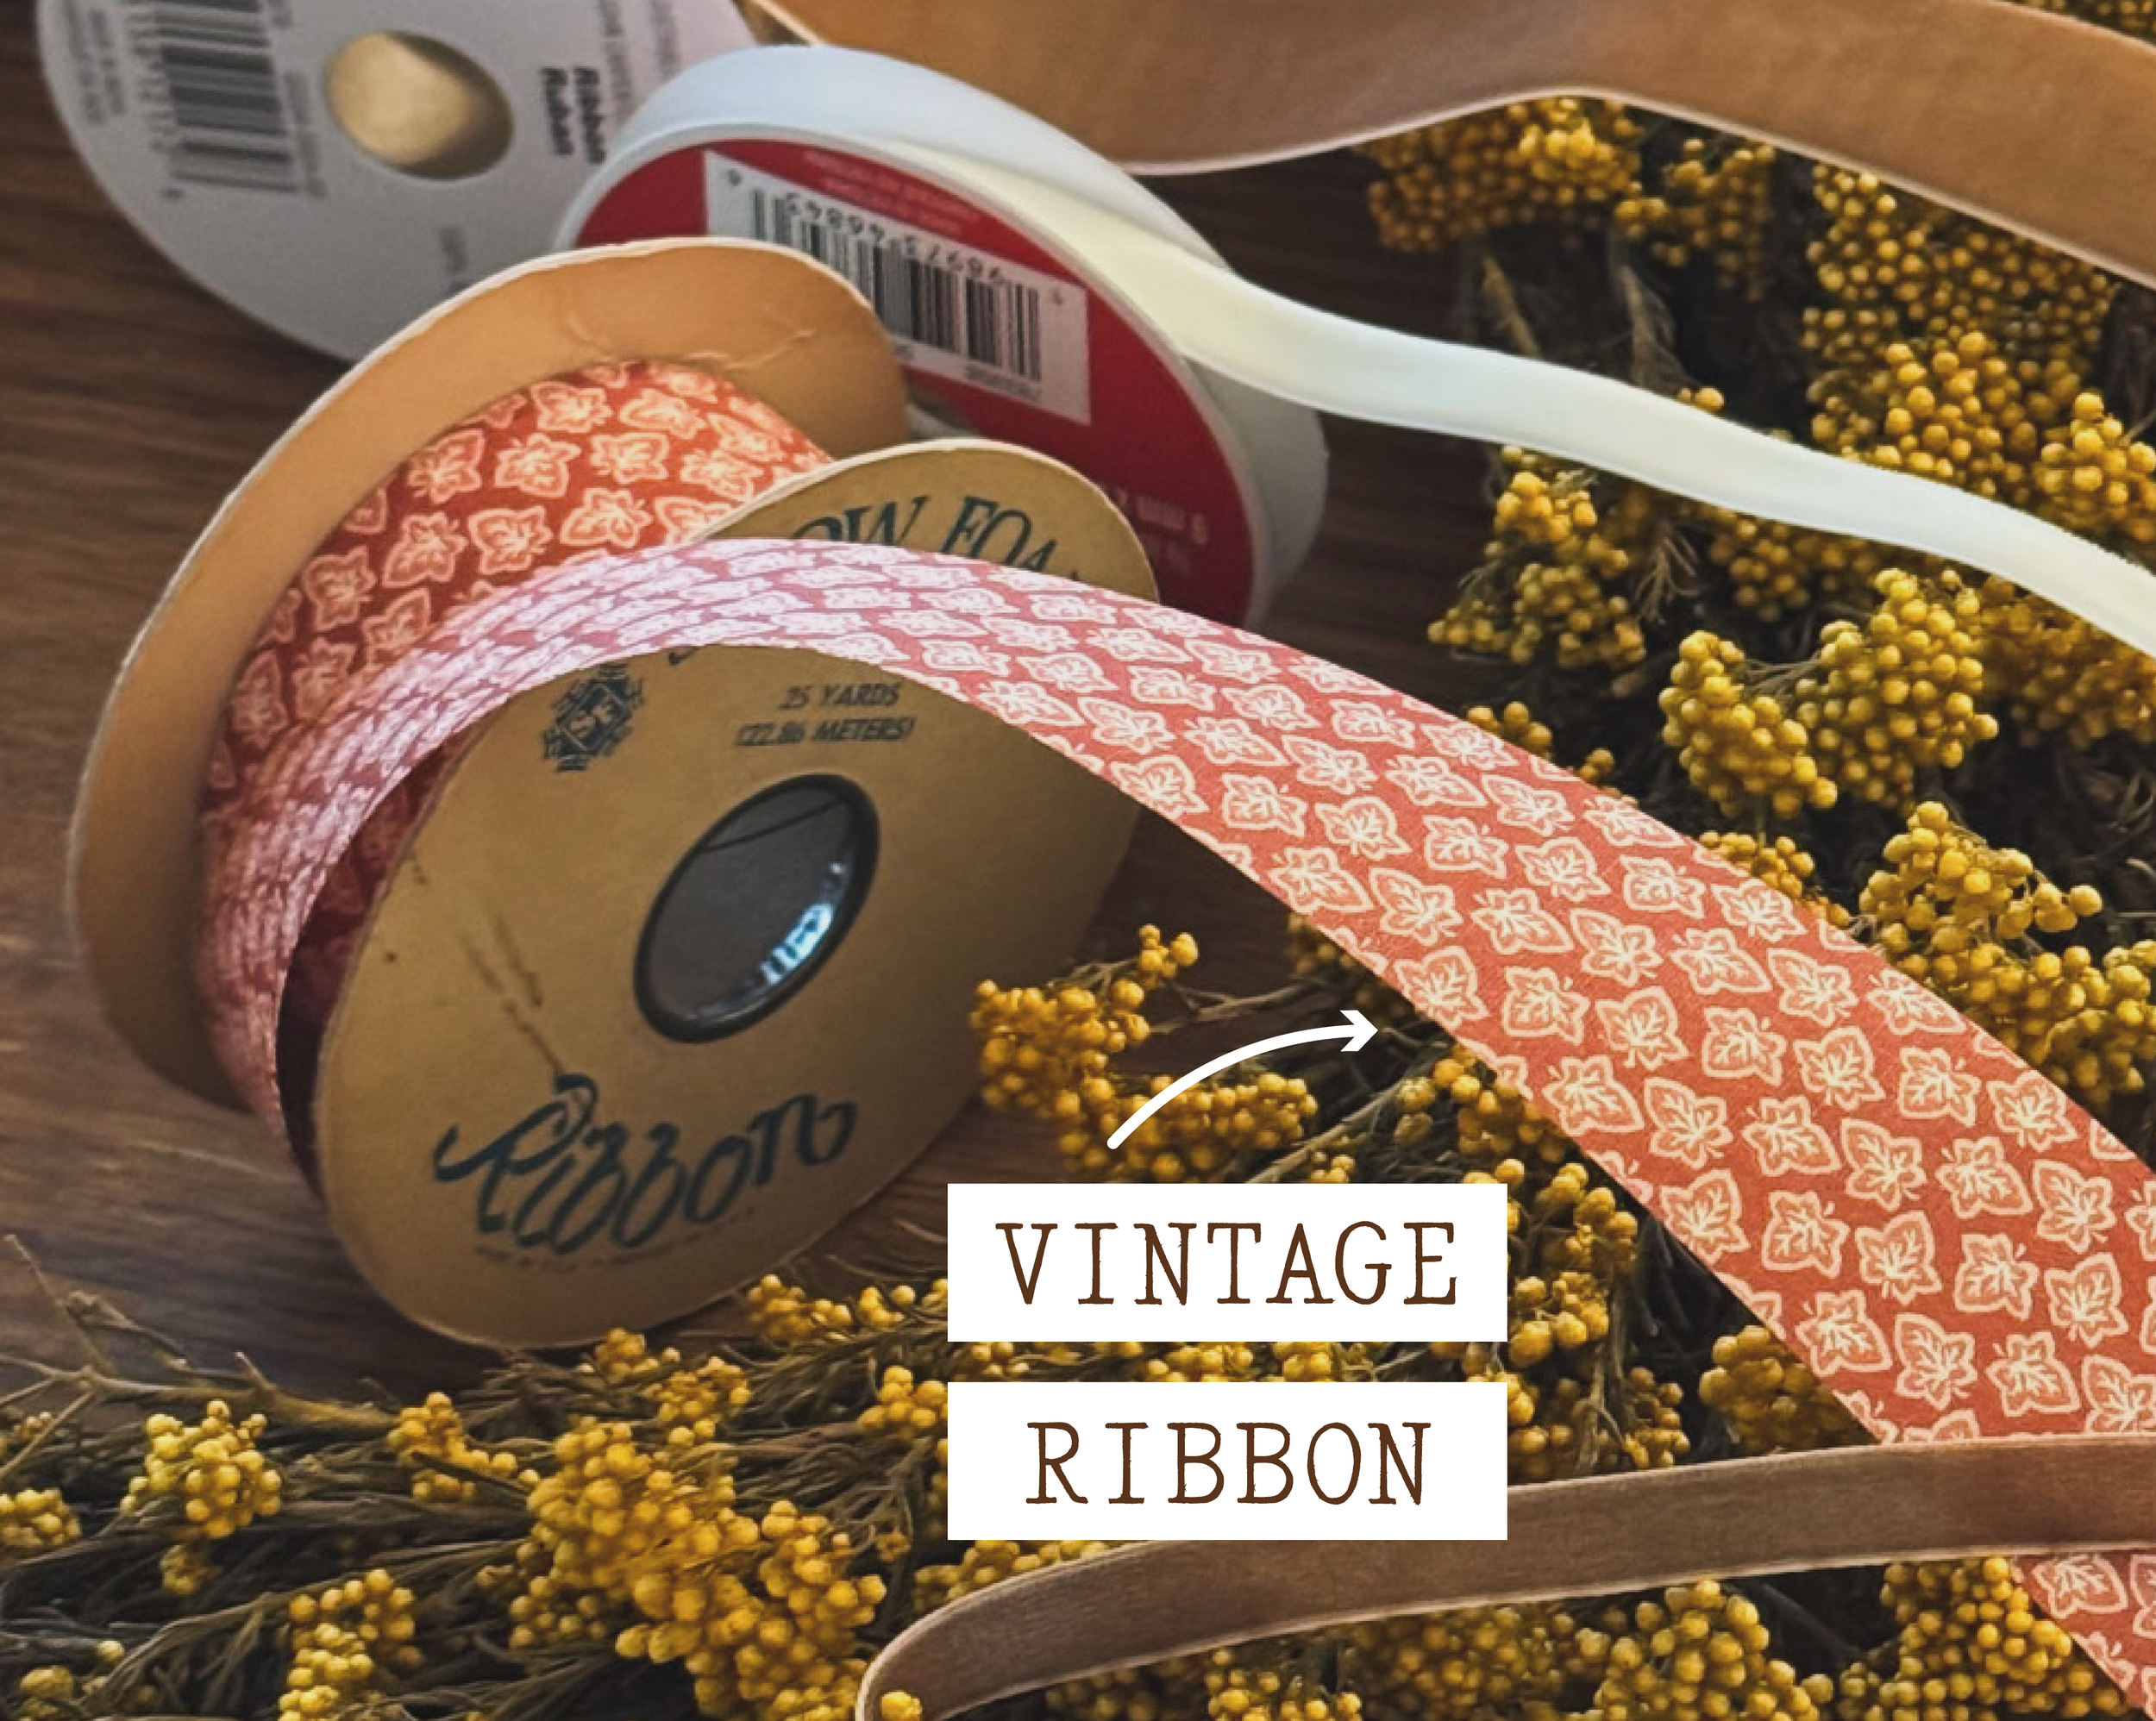
STATEMENT RIBBON (my statement ribbon was the vintage ribbon with maple leaves, but any patterned option would be cute! maybe gingham!!)
2-4 COMPLIMENTARY RIBBONS IN VARIOUS SIZES AND COLORS (at least 2 other ribbons, I used 3 other velvet ribbons in mine, all from Michael’s)
FABRIC SCISSORS (especially helpful for thicker velvet or satin ribbon! here is the pair I own)
TWISTY TIES (to attach the ribbons to the branches of your leaves; this is better than gluing so that you can remove the bows if you want to later on!)
WREATH HOOK (to hang your beautiful wreath on your door once it’s compete!)


STEP-BY-STEP INSTRUCTIONS:
This is really such an easy and fun craft; the most time-consuming part is just tying the ribbon into bows! You can watch the video of me making my wreath on my Instagram or TikTok.
STEP ONE: Gather your wreath base, your tools, and all your different ribbons.
STEP TWO: Start with your statement ribbon, and tie it into your largest bow. This will be your main bow and the focal point. Once you determine this bow’s size, you can start tying all your other bows in various (but smaller) sizes.
STEP THREE: Once all your bows are made, determine where each bow will be placed on the wreath (do not glue or attach any bows yet)
STEP FOUR: Now that you know where each bow will go, take each bow one-by-one and fasten a twisty tie to it. To do this, simply slip the twisty tie through the middle knot on the backside of each bow. The twisty tie will not be visible from the front of the bow. Attach the bow to the wreath by wrapping the twisty tie around a branch/sprig of the wreath.
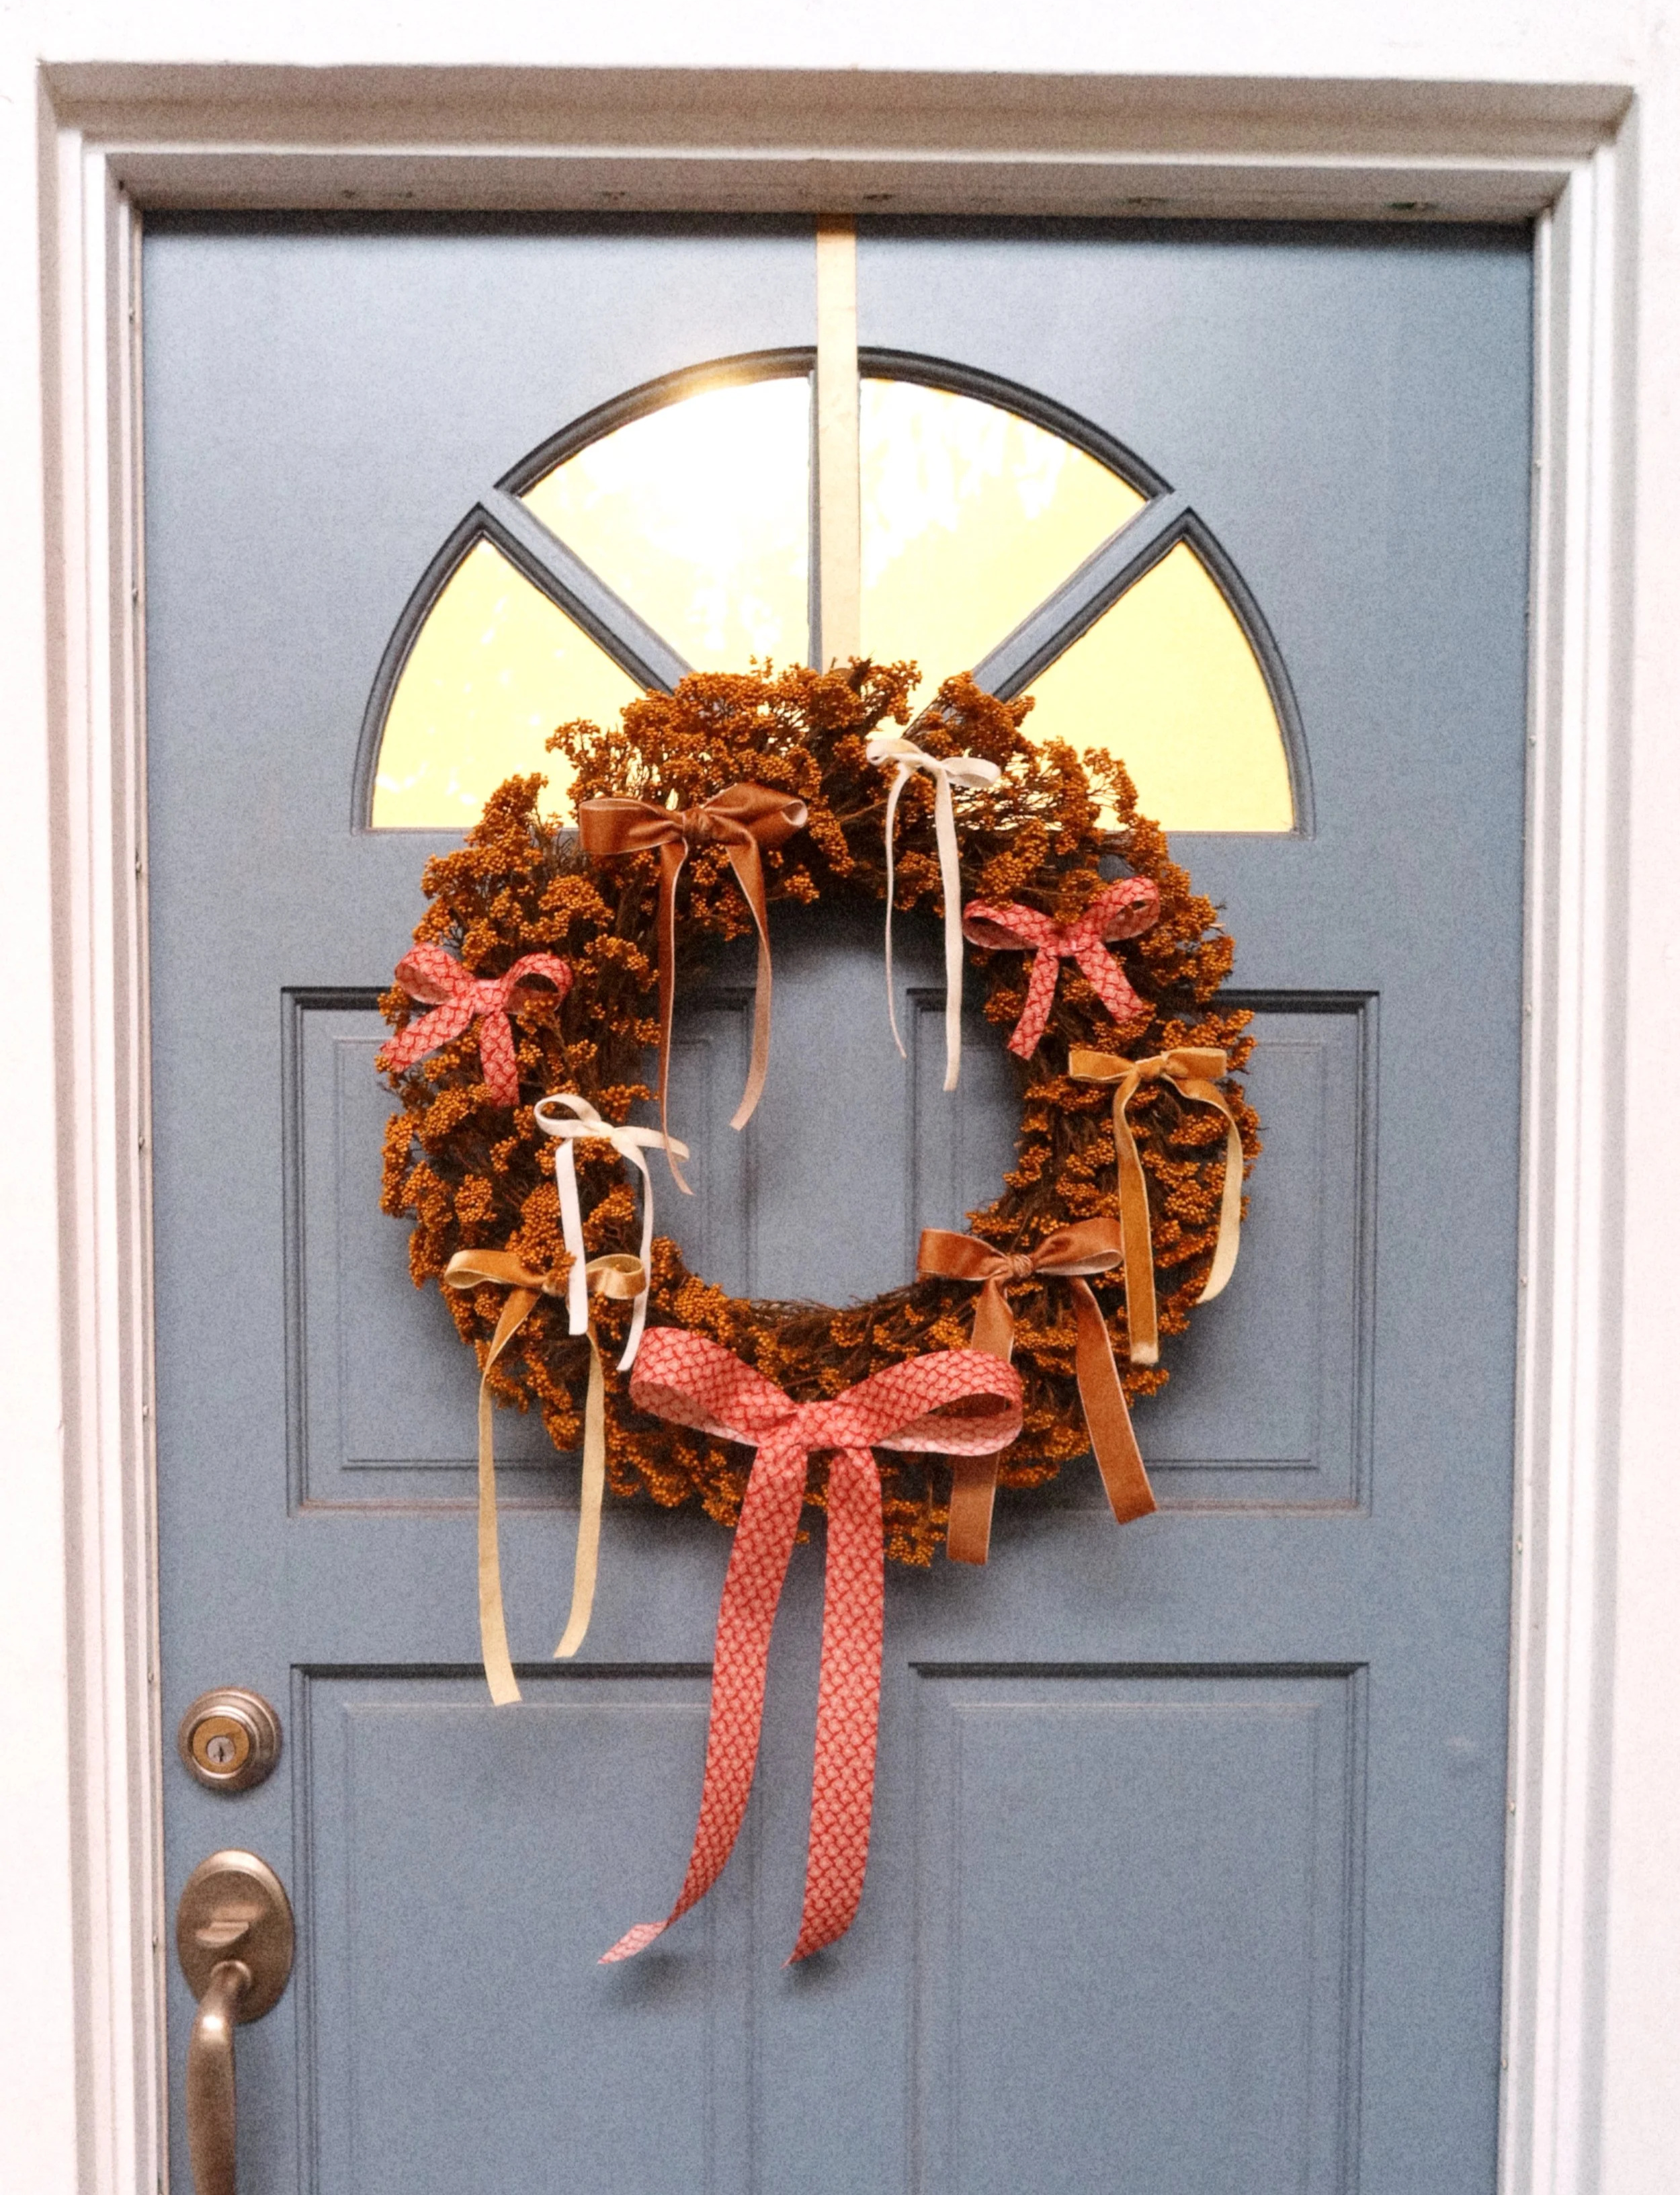
STEP FIVE: Once all bows are attached to the wreath, you’re done! It’s time to place it on your wreath hook and display it on your front door.